
This post runs through the deployment of Tanzu Community Edition onto Azure - we will look at creating a Management Cluster, a Workload Cluster and the deployment of a demo application.
Prepare Bootstrap Device/VM
Install the TCE Tanzu CLI - https://tanzucommunityedition.io/docs/latest/cli-installation/ (opens in a new tab)
You will need both kubectl and docker installed.
If you are using Windows and hit the x509 certificate error, follow the steps here to resolve: https://tanzucommunityedition.io/docs/latest/faq-cluster-bootstrapping/ (opens in a new tab)
When the CLI is installed;
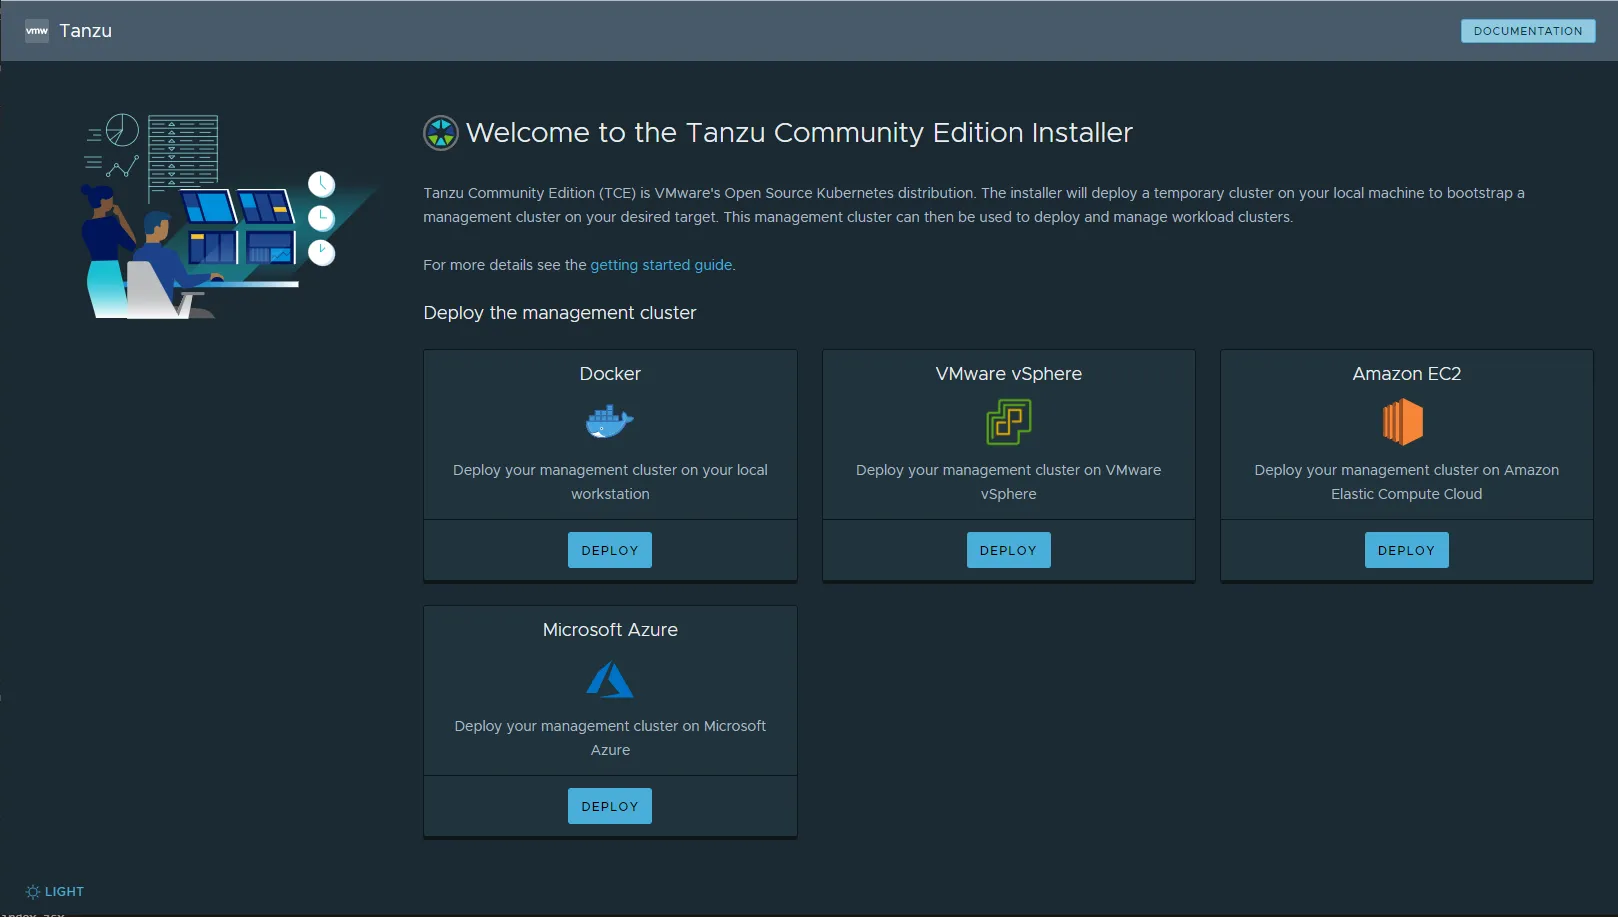
tanzu management-cluster create --uito open up the browser based installer on the bootstrap device.- Alternatively, use the following command to access the UI from another device
tanzu management-cluster create --ui --bind <BOOTSTRAP_DEVICE_IP>:<PORT> --browser none
Prepare Azure Environment
Follow the steps here to prepare for an Azure installation: https://tanzucommunityedition.io/docs/latest/azure-mgmt/ (opens in a new tab)
To quickly summarise what you will need to complete:
- Get Tenant ID
- Create App Registration
- Get Application ID (Client ID)
- Get Subscription ID
- Configure Access control
- Configure Client secret
- Accept base image license
- Configure SSH keys
Deploy TCE Cluster
From the UI select the Azure deploy button, populate the Tenant ID, Client ID, Client Secret and Subscription ID fields and press Connect.
Select the appropriate Region for your deployment, in my case it is UK South.
Enter your public SSH key.
As this is my first TCE deployment I will be creating a new Resource Group - I have named it TCE
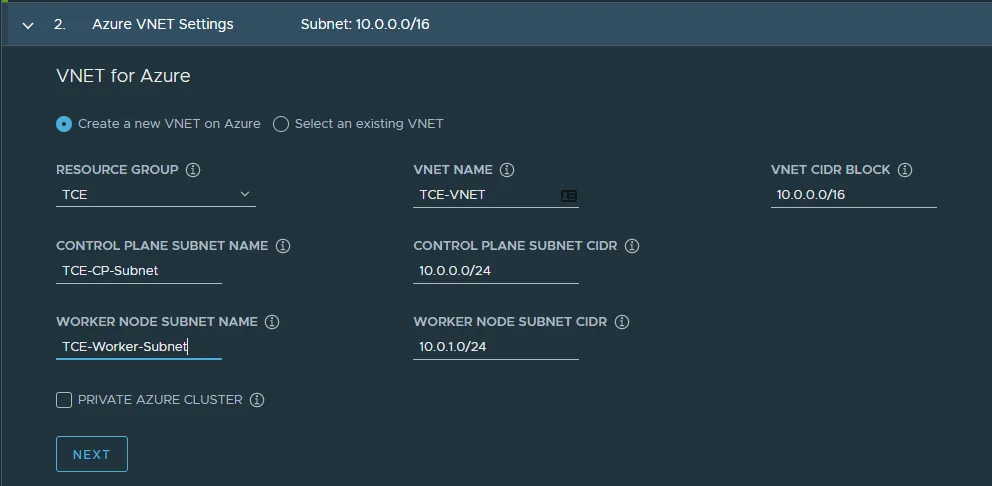
To save some costs on this initial installation we will deploy a Development cluster.
Select an appropriate Instance Type from the dropdown list - you can use a service such as https://azureprice.net (opens in a new tab) to find the out the cheapest option - for me it looks like Standard_F2s_v2 is the cheapest choice, giving me 2 vCPU and 4Gb memory, if I pay slightly more I can bump up to a Standard_D2s_v3 to give me 2 vCPU and 8Gb memory.
Once all the fields are populated we will have our dev plan.
- We do not need to provide any additional Metadata.
- We can accept the default settings for the Antrea CNI.
- We will leave Identity Management off for now.
- Select an appropriate OS image, for this I have gone with Ubuntu 20.04.
- We will skip the Tanzu Mission Control (TMC) registration.
Review and validate the configuration settings.
In the CLI Command Equivalent box you will see where the temporary YAML file is stored. Take note of the directory for this file, we can use it as a template for our Workload Cluster, it will look something like this: /home/tanzu/.config/tanzu/tkg/clusterconfigs/37elw85tmr.yaml
Press Deploy Management Cluster and follow along the installation
Follow the Installation
The TCE deployment will run through multiple stages, you can monitor progress through the logs but you can also see whats happening via kubectl and the Azure portal.
Setup bootstrap cluster
- After the image has been pulled you will see a container running within Docker, this is the bootstrap image which will do all the necessary things to then create a cluster within Azure.
- When the Azure based management cluster is running, the bootstrap cluster will hand over to it.
- Within the logs you will see reference to a kubeconfig file.
Bootstrapper created. Kubeconfig: /home/tanzu/.kube-tkg/tmp/config_Jpd1gEfK- you can use this to runkubectlcommands on the bootstrap cluster to see what is happening:kubectl get pod -A --kubeconfig /home/tanzu/.kube-tkg/tmp/config_Jpd1gEfK
Install providers on bootstrap cluster
- This stage will bring up additional pods and deployments that are required for the provisioning of clusters into Azure.
Create management cluster
- At this point activity will start within Azure, head to https://portal.azure.com (opens in a new tab) and monitor the items that get created, such as a resource group, network, load balancers, security groups and VMs.
- Within the logs you will see reference to another kubeconfig
Saving management cluster kubeconfig into /home/tanzu/.kube/config. - You can set your context to the new management cluster to monitor progress
kubectl config get-contextsCURRENT NAME CLUSTER AUTHINFO NAMESPACE tce-azure-mgmt-admin@tce-azure-mgmt tce-azure-mgmt tce-azure-mgmt-admin tce-mgmt-admin@tce-mgmt tce-mgmt tce-mgmt-admin* tce-wl01-admin@tce-wl01 tce-wl01 tce-wl01-adminkubectl config use-context tce-azure-mgmt-admin@tce-azure-mgmtInstall providers on management cluster
- This stage will bring up additional pods and deployments that are required for the management of clusters into Azure.
Deploy Workload Cluster
We can use the yaml file that was created by the UI for our Management Cluster to create our Workload Cluster.
- Copy the yaml used for the management cluster:
cp /home/tanzu/.config/tanzu/tkg/clusterconfigs/37elw85tmr.yaml /home/tanzu/.config/tanzu/tkg/clusterconfigs/azure-wl01.yaml - Edit the yaml and tidy up to reduce any unnecessary info (see example below):
vi /home/tanzu/.config/tanzu/tkg/clusterconfigs/azure-wl01.yaml - Deploy the cluster:
tanzu cluster create tce-azure-wl01 --file /home/tanzu/.config/tanzu/tkg/clusterconfigs/azure-wl01.yaml -v 6
As we have not specified the names of VNET’s or SUBNETS’s, you will notice that they inherit the clusters name, such as tce-azure-wl01-vnet and tce-azure-wl01-node-subnet, other resources inherit this naming convention too.
As we did specify the resource group (TCE), all the resources will be created inside this.
CLUSTER_PLAN: devNAMESPACE: defaultCNI: antrea AZURE_CONTROL_PLANE_MACHINE_TYPE: Standard_D2s_v3AZURE_NODE_MACHINE_TYPE: Standard_D2s_v3AZURE_TENANT_ID: <TENANT_ID>AZURE_SUBSCRIPTION_ID: <SUBSCRIPTION_ID>AZURE_CLIENT_ID: <CLIENT_ID>AZURE_CLIENT_SECRET: <CLIENT_SECRET>AZURE_LOCATION: uksouthAZURE_SSH_PUBLIC_KEY_B64: <SSH_KEY> AZURE_RESOURCE_GROUP: TCE CLUSTER_CIDR: 100.96.0.0/11SERVICE_CIDR: 100.64.0.0/13ENABLE_MHC: "true"OS_ARCH: amd64OS_NAME: ubuntuOS_VERSION: "20.04"Change to the context of your new workload cluster once it has been created:
tanzu cluster kubeconfig get tce-azure-wl01 --adminkubectl config use-context tce-azure-wl01-admin@tce-azure-wl01Deploy Example Application
For this we will use the ACME fitness demo application - https://github.com/vmwarecloudadvocacy/acme_fitness_demo/tree/master/kubernetes-manifests (opens in a new tab)
## Clone Repomkdir /home/tanzu/demo-appscd /home/tanzu/demo-appsgit clone https://github.com/vmwarecloudadvocacy/acme_fitness_demo.gitcd acme_fitness_demo/kubernetes-manifests ## Set ENV APP_PASSWORD=DemoApp123!APP_NAMESPACE=acme-demo ## Deploy Appkubectl create ns ${APP_NAMESPACE}kubectl create secret generic cart-redis-pass --from-literal=password=${APP_PASSWORD} -n ${APP_NAMESPACE} kubectl apply -f cart-redis-total.yaml -n ${APP_NAMESPACE} kubectl apply -f cart-total.yaml -n ${APP_NAMESPACE} kubectl create secret generic catalog-mongo-pass --from-literal=password=${APP_PASSWORD} -n ${APP_NAMESPACE} kubectl create -f catalog-db-initdb-configmap.yaml -n ${APP_NAMESPACE} kubectl apply -f catalog-db-total.yaml -n ${APP_NAMESPACE} kubectl apply -f catalog-total.yaml -n ${APP_NAMESPACE} kubectl apply -f payment-total.yaml -n ${APP_NAMESPACE} kubectl create secret generic order-postgres-pass --from-literal=password=${APP_PASSWORD} -n ${APP_NAMESPACE} kubectl apply -f order-db-total.yaml -n ${APP_NAMESPACE} kubectl apply -f order-total.yaml -n ${APP_NAMESPACE} kubectl create secret generic users-mongo-pass --from-literal=password=${APP_PASSWORD} -n ${APP_NAMESPACE} kubectl create secret generic users-redis-pass --from-literal=password=${APP_PASSWORD} -n ${APP_NAMESPACE} kubectl create -f users-db-initdb-configmap.yaml -n ${APP_NAMESPACE} kubectl apply -f users-db-total.yaml -n ${APP_NAMESPACE} kubectl apply -f users-redis-total.yaml -n ${APP_NAMESPACE} kubectl apply -f users-total.yaml -n ${APP_NAMESPACE} kubectl apply -f frontend-total.yaml -n ${APP_NAMESPACE} kubectl apply -f point-of-sales-total.yaml -n ${APP_NAMESPACE} ## Monitor Appkubectl get pods -n ${APP_NAMESPACE} kubectl get service frontend -n ${APP_NAMESPACE} Using the external IP listed against the service you should be able to browse to the website: http://<external-service-IP>
Octant
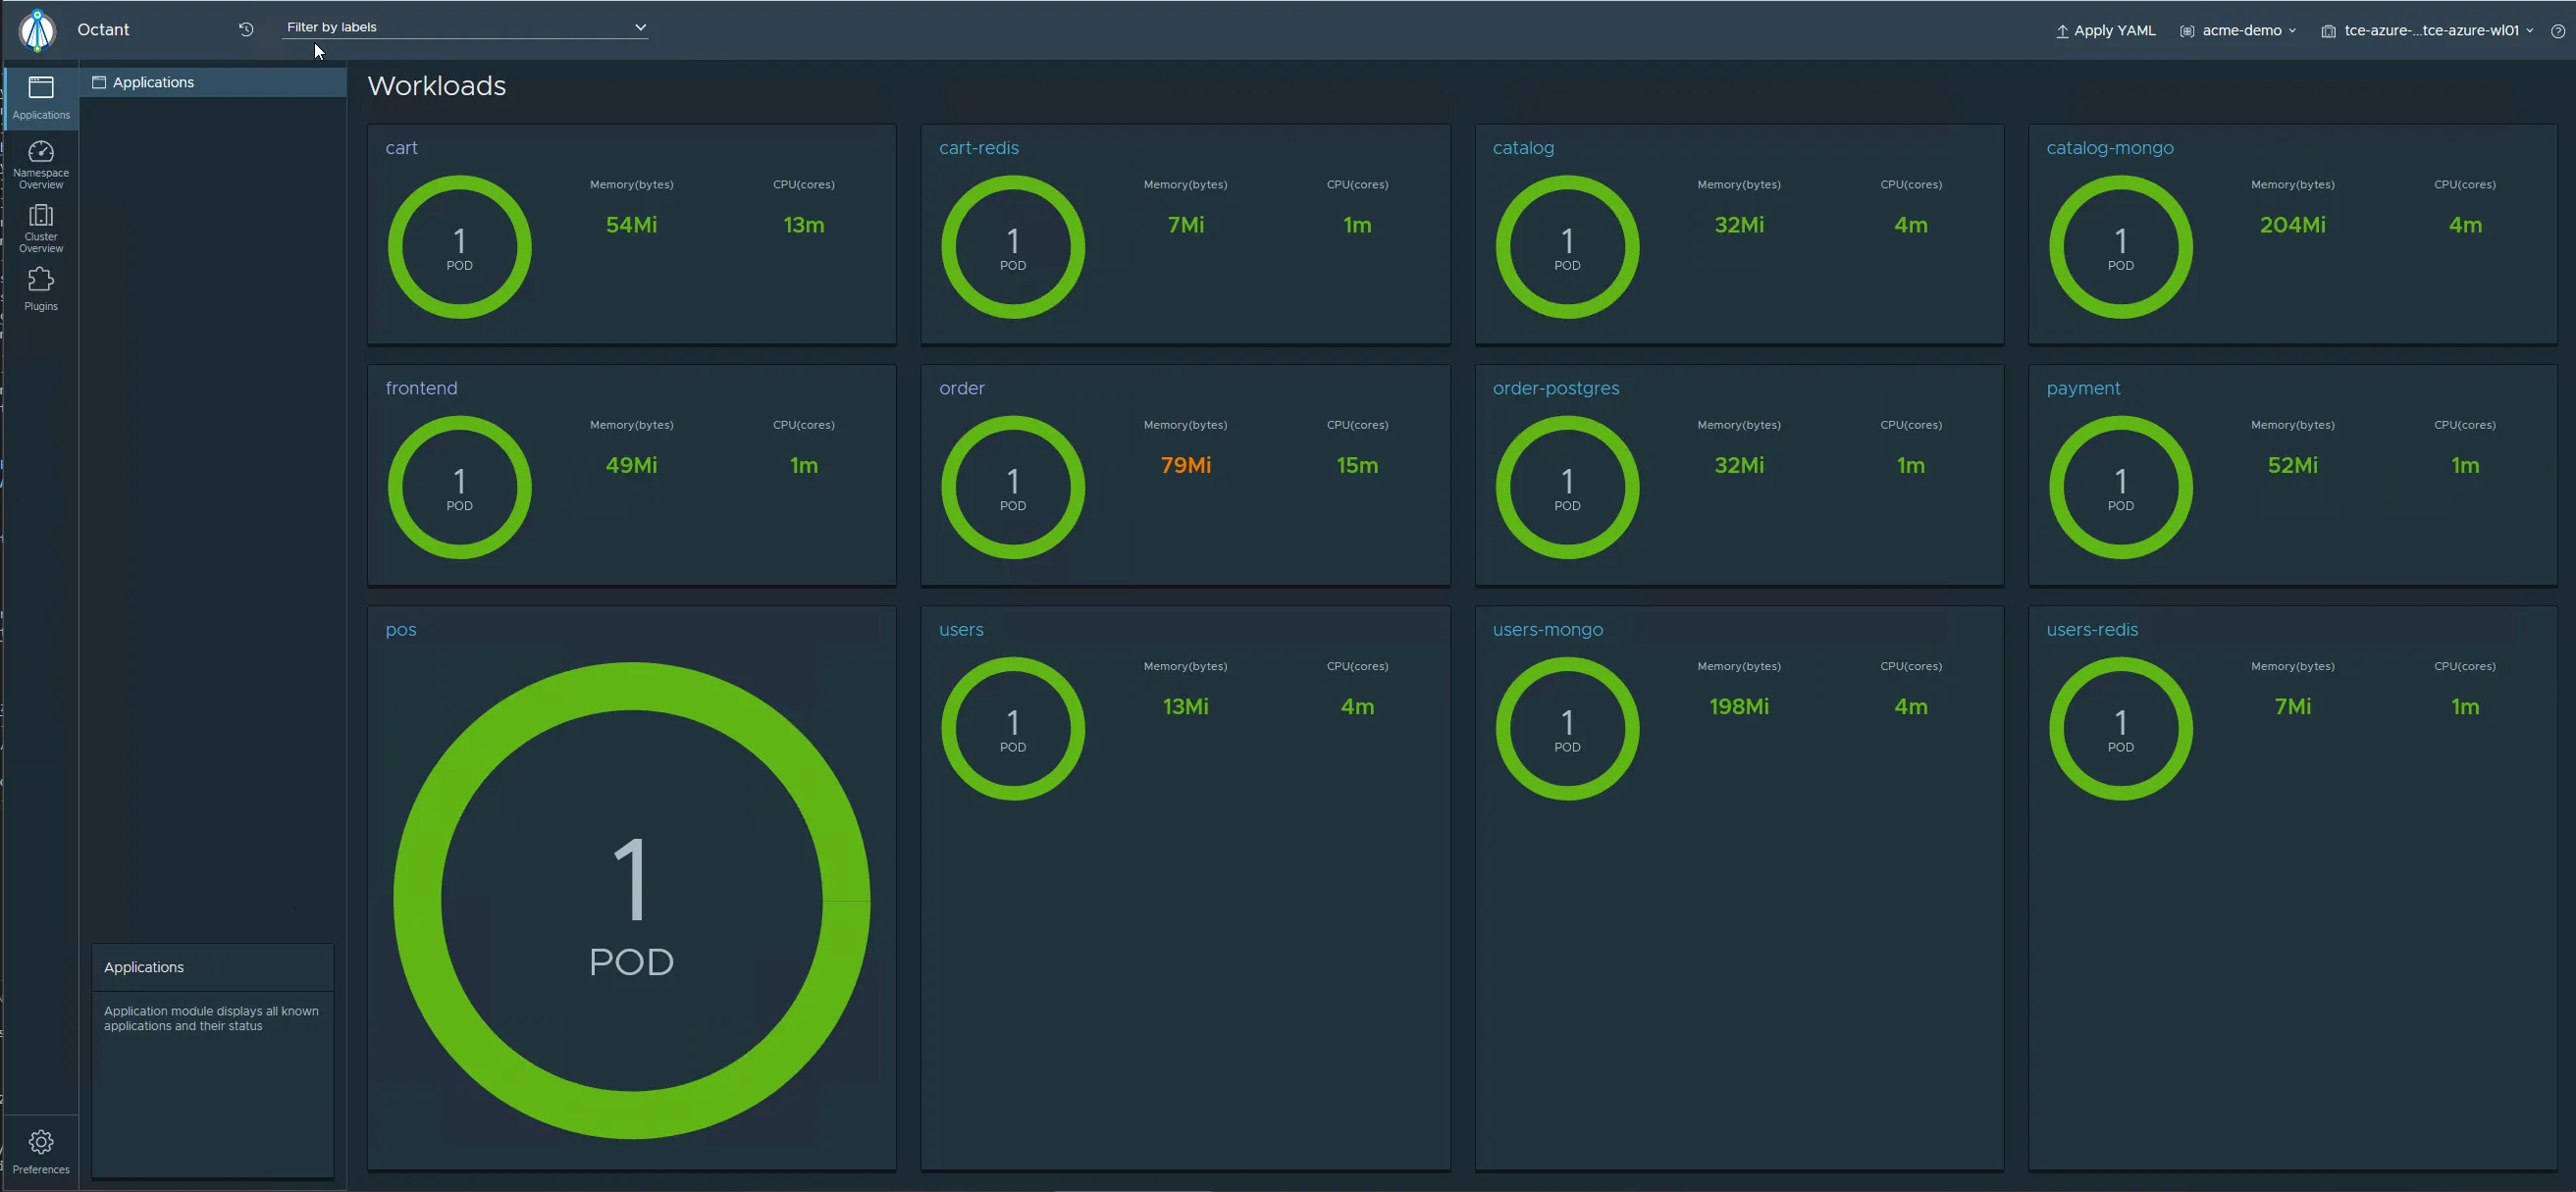
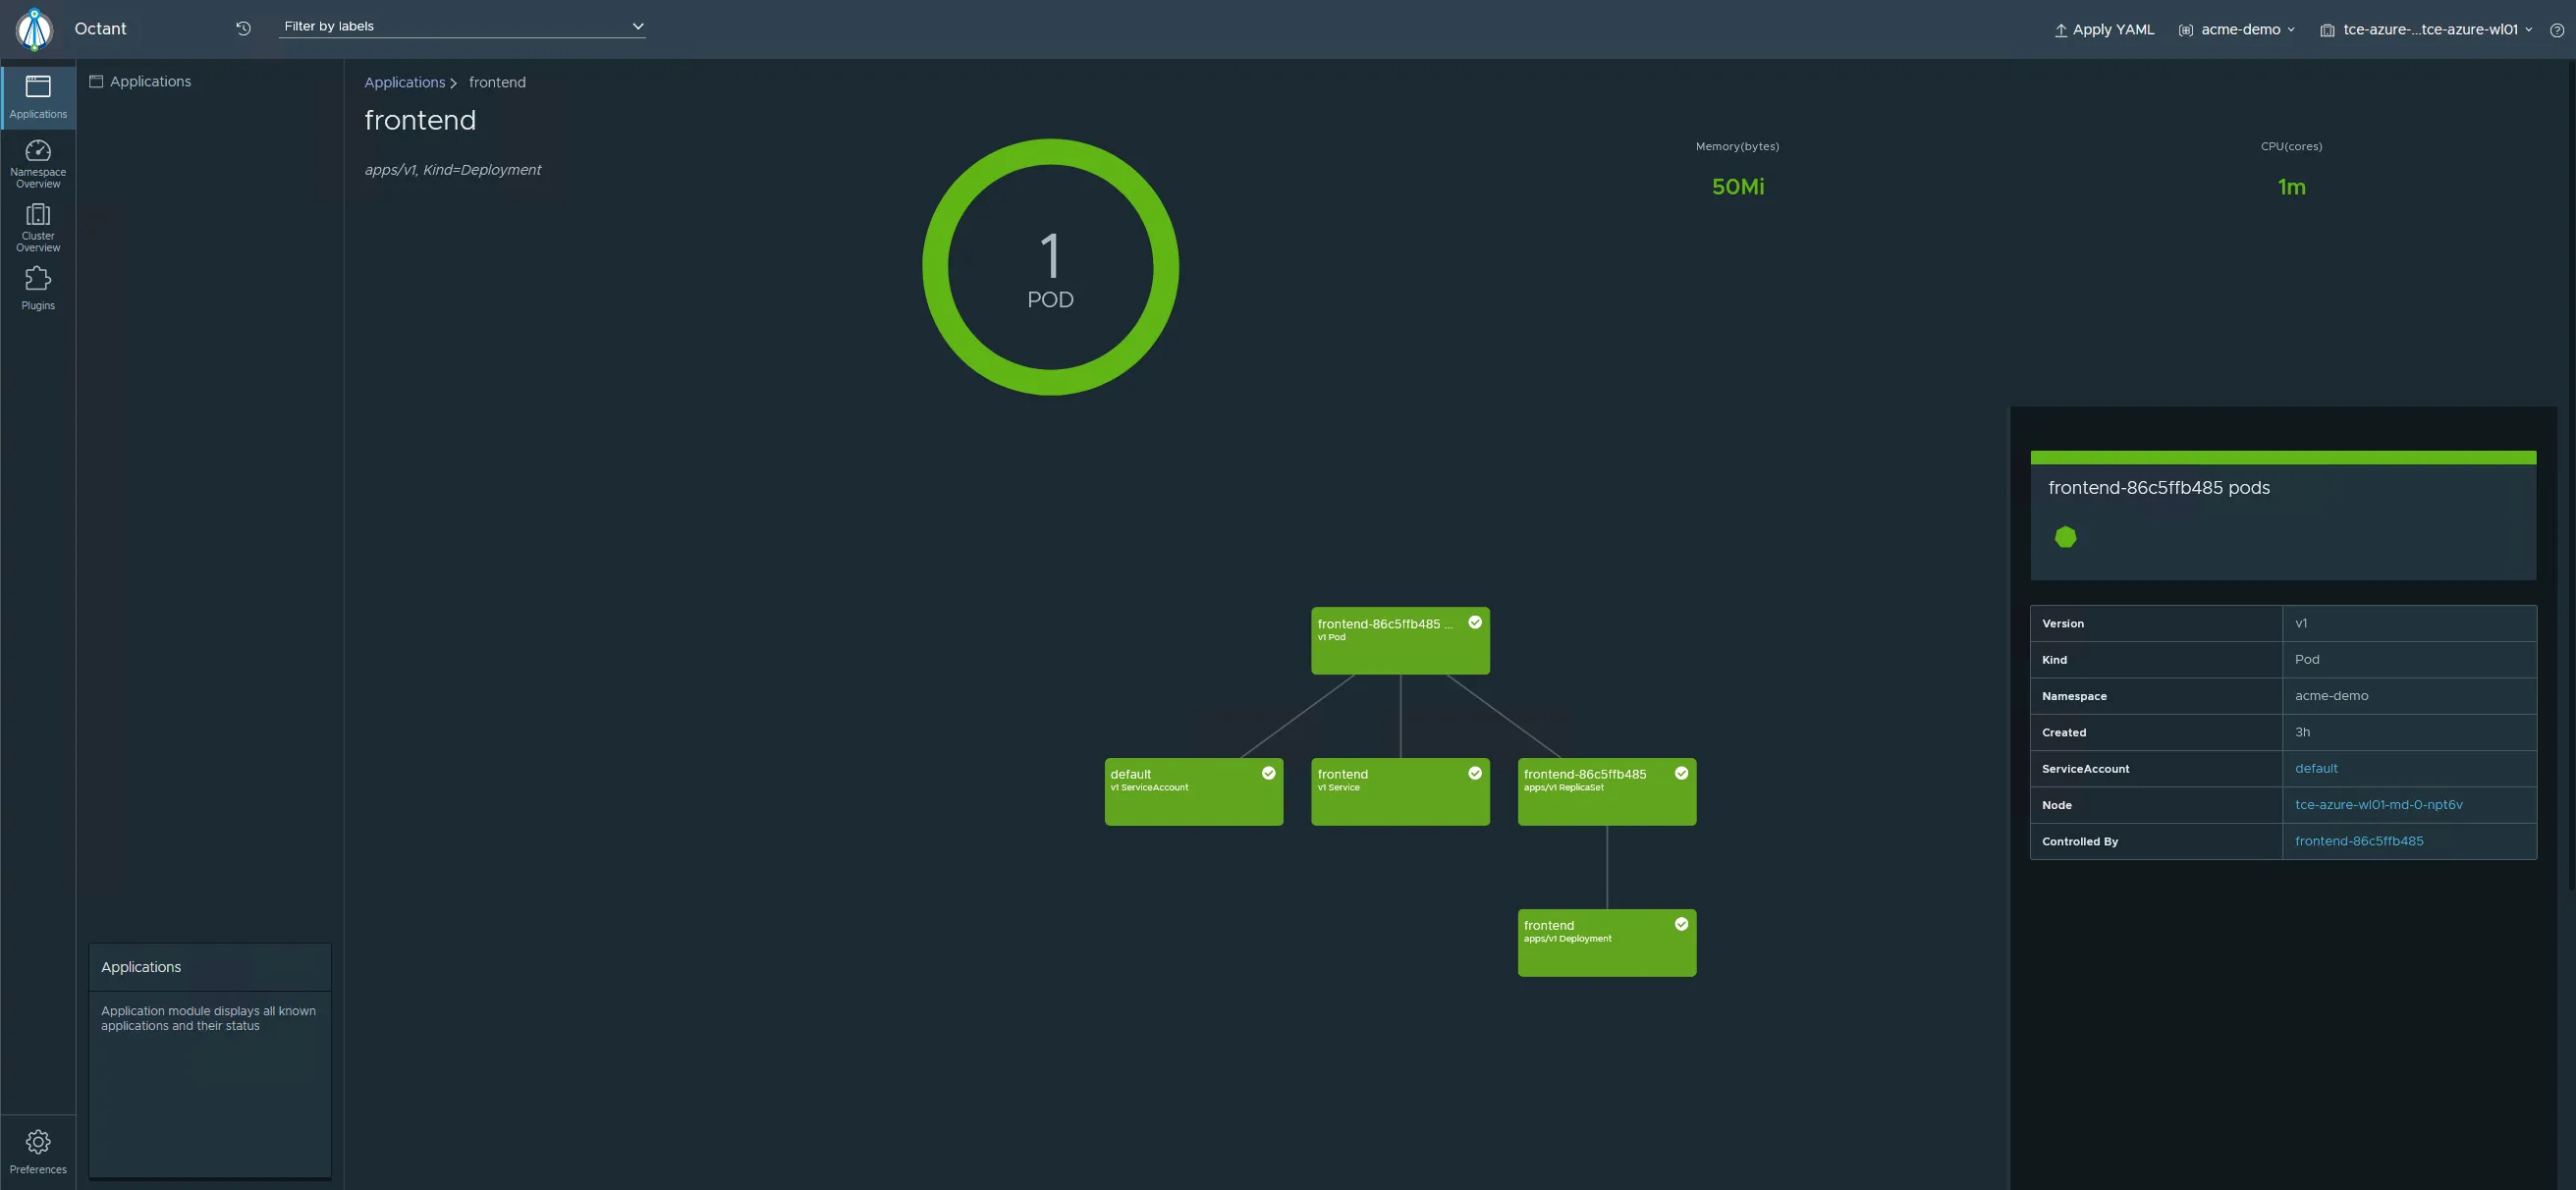
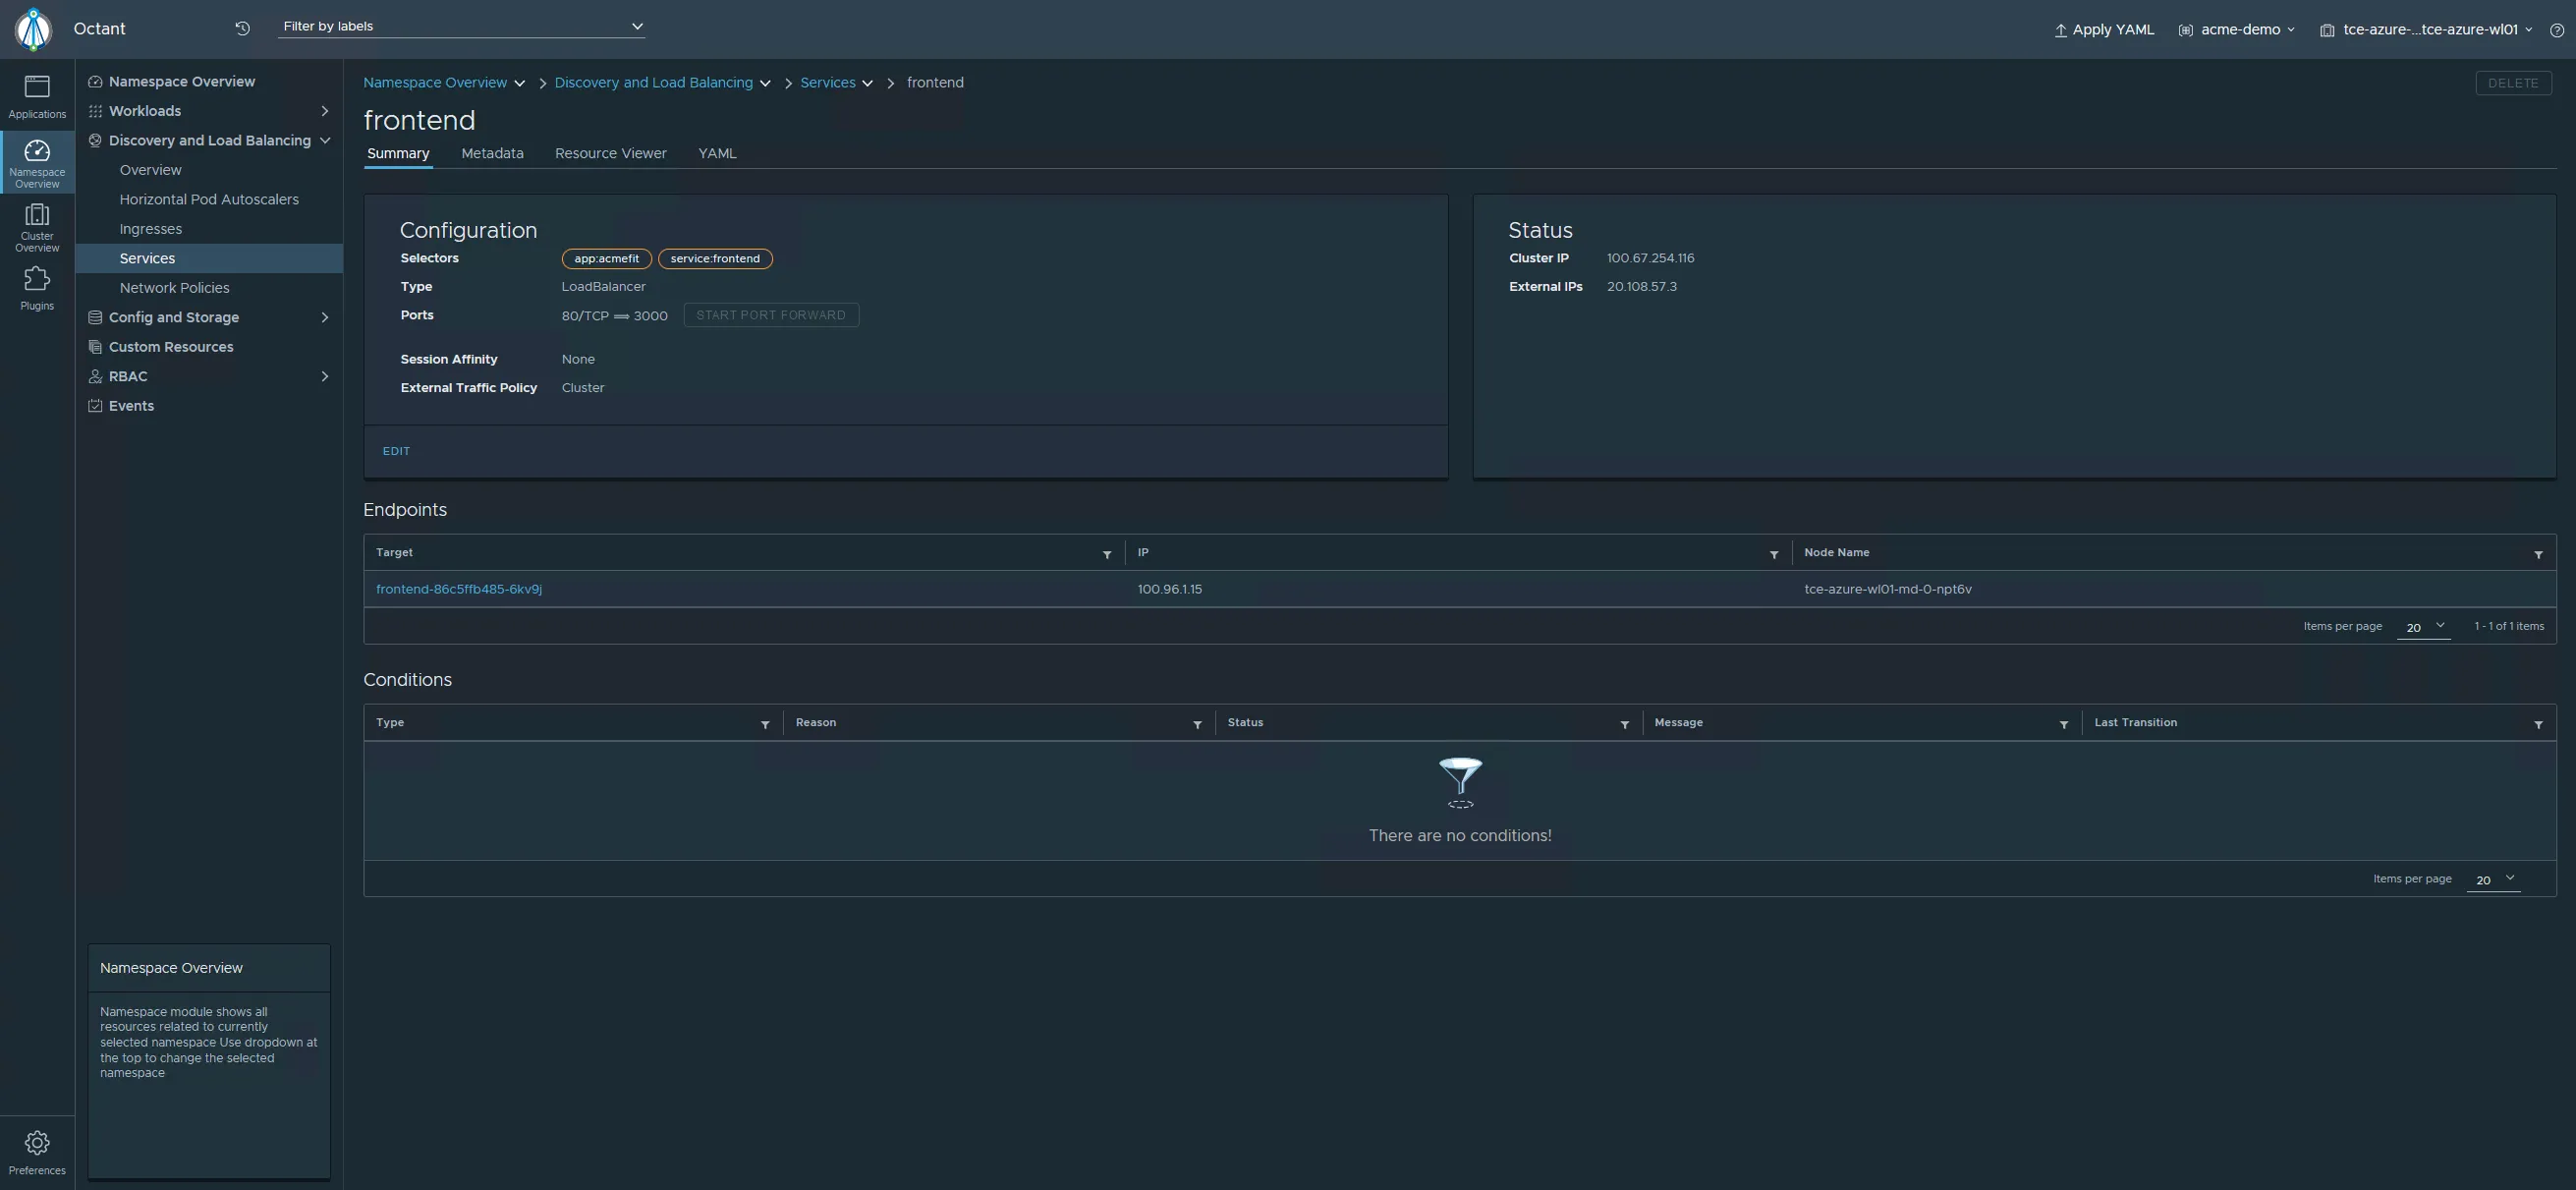
Lets use Octant to view the cluster https://github.com/vmware-tanzu/octant/releases (opens in a new tab)
cd /tmpwget https://github.com/vmware-tanzu/octant/releases/download/v0.25.0/octant_0.25.0_Linux-64bit.tar.gztar -xzvf /tmp/octant_0.25.0_Linux-64bit.tar.gzmv /tmp/octant_0.25.0_Linux-64bit /usr/bin/octantI am starting octant with the following command so I can access the UI from another device, the value for the OCTANT_ACCEPTED_HOSTS variable is the IP of the octant host.
OCTANT_ACCEPTED_HOSTS=$(/sbin/ip -o -4 addr list eth0 | awk '{print $4}' | cut -d/ -f1) KUBECONFIG=/home/tanzu/.kube/config OCTANT_LISTENER_ADDR=0.0.0.0:8900 OCTANT_DISABLE_OPEN_BROWSER=true octant
Tidy Up
Delete workload cluster
Get the current Tanzu clusters and identify the name of the cluster to delete.
tanzu cluster listNAME NAMESPACE STATUS CONTROLPLANE WORKERS KUBERNETES ROLES PLANtce-azure-wl01 default running 1/1 1/1 v1.21.2+vmware.1 <none> devStart the cluster deletion. It will take a few minutes to clean up in Azure. Within the Azure portal you will start to see resources be deleted.
tanzu cluster delete tce-azure-wl01Deleting workload cluster 'tce-azure-wl01'. Are you sure? [y/N]: yWorkload cluster 'tce-azure-wl01' is being deletedMonitor the deletion of the cluster, you can use both kubectl and tanzu commands.
kubectl get clusterNAME PHASEtce-azure-wl01 Deleting tanzu cluster listNAME NAMESPACE STATUS CONTROLPLANE WORKERS KUBERNETES ROLES PLANtce-azure-wl01 default deleting 1/1 v1.21.2+vmware.1 <none> devAfter the deletion has completed, the two commands will return no results.
kubectl get clusterNo resources found in default namespace. tanzu cluster listNAME NAMESPACE STATUS CONTROLPLANE WORKERS KUBERNETES ROLES PLANYou might need to delete the workload clusters context from your config file: kubectl config delete-context tce-azure-wl01-admin@tce-azure-wl01
Delete management cluster
When the process to delete a management cluster is started a temporary kind cluster is stood up to manage the deletion. The kind cluster is then deleted after completion.
Retrieve the name of the management cluster.
tanzu management-cluster getNAME NAMESPACE STATUS CONTROLPLANE WORKERS KUBERNETES ROLEStce-azure-mgmt tkg-system running 1/1 1/1 v1.21.2+vmware.1 managementStart the deletion of the management cluster.
tanzu management-cluster delete tce-azure-mgmtDeleting management cluster 'tce-azure-mgmt'. Are you sure? [y/N]: yYou can monitor the status of the temporary kind cluster through the use of docker and the temporary kubeconfig that is created.
Temporary kubeconfig files are stored in ~/.kube-tkg/tmp
docker ps -aCONTAINER ID IMAGE COMMAND CREATED STATUS PORTS NAMESe52dac6edc9b projects.registry.vmware.com/tkg/kind/node:v1.21.2_vmware.1 "/usr/local/bin/entr…" 3 minutes ago Up 2 minutes 127.0.0.1:37555->6443/tcp tkg-kind-c82jls8gcv0cn7u54j30-control-plane kubectl get cluster -A --kubeconfig /home/tanzu/.kube-tkg/tmp/config_jIv63FNDNAMESPACE NAME PHASEtkg-system tce-azure-mgmt DeletingLog output from deleting management cluster
tanzu management-cluster delete tce-azure-mgmtDeleting management cluster 'tce-azure-mgmt'. Are you sure? [y/N]: yVerifying management cluster...Setting up cleanup cluster...Installing providers to cleanup cluster...Fetching providersInstalling cert-manager Version="v1.1.0"Waiting for cert-manager to be available...Installing Provider="cluster-api" Version="v0.3.23" TargetNamespace="capi-system"Installing Provider="bootstrap-kubeadm" Version="v0.3.23" TargetNamespace="capi-kubeadm-bootstrap-system"Installing Provider="control-plane-kubeadm" Version="v0.3.23" TargetNamespace="capi-kubeadm-control-plane-system"Installing Provider="infrastructure-azure" Version="v0.4.15" TargetNamespace="capz-system"Moving Cluster API objects from management cluster to cleanup cluster...Performing move...Discovering Cluster API objectsMoving Cluster API objects Clusters=1Creating objects in the target clusterDeleting objects from the source clusterWaiting for the Cluster API objects to get ready after move...Deleting management cluster...Management cluster 'tce-azure-mgmt' deleted.Deleting the management cluster context from the kubeconfig file '/home/tanzu/.kube/config'warning: this removed your active context, use "kubectl config use-context" to select a different one Management cluster deleted!Your Azure portal should now be empty of any resources from this deployment.